Plumbers install and repair pipes and fixtures that supply water and carry waste away in residential, commercial, and industrial buildings. Their duties include reading and interpreting blueprints, inspecting plumbing systems, and troubleshooting problems like leaks and blockages. Contact Plumber Montgomery County for professional help.
Plumbers must have strong customer service skills to listen to client’s needs and explain complex issues in simple terms. They must also be comfortable working with tools and in tight spaces.
A faucet that drips can be a nuisance and over time, if not fixed, it can cause water damage to the home and possibly even result in a higher water bill. Luckily, most leaky faucets are easy to fix for homeowners that are handy and willing to do a little bit of elbow grease.
Before you attempt any repairs, it is important to turn off the water supply to the faucet. This step will ensure that you do not accidentally leak any water while working on the faucet. It is also a good idea to have a bucket and towel handy in case any water does leak out during the repair process.
After turning off the water, the next step is to remove the faucet handle. There is usually a screw that secures the handle to the stem. This is usually a standard flathead screw, but sometimes the handles are held on by hex set screws. If this is the case, it may be necessary to have a hex wrench available to loosen the screw. Once the screw is removed, the handle should pull off easily. If not, it may be a good idea to use penetrating oil to help loosen the handle and make it easier to remove.
Once the handle is removed, it is possible to see what type of faucet you have and how to proceed with the repair. If you have a cartridge faucet, you will need to take out the old cartridge and replace it with a new one. This is a fairly simple process and can be done with a pair of needle-nose pliers.
Ball faucets are typically very easy to work on. There are two types of seals in a ball faucet: the O-ring and the inlet seal. These can get worn out over time and need to be replaced. The replacement O-rings are easy to find and affordable. The inlet seal is a little harder to replace, and you will need to take the entire faucet apart to do it.
Once all the parts have been replaced, you will need to reassemble the faucet. Before doing this, it is a good idea to clean any mineral deposits or rust off of the components with vinegar or another mild cleaning solution. This will ensure that all of the parts are properly cleaned and ready to be reassembled. If you would like, you can also apply a coat of plumber’s grease to all of the O-rings and other moving parts to help keep them in place and moving smoothly.
Finally, reassemble the faucet and test it for any leaks. Be sure to tighten all of the screws and connections securely, but do not over-tighten them. Once the faucet is reassembled, it is a good idea to turn the water back on and test it again for any leaks.
Faucet Installation
While today’s faucets are easier than ever to install, many homeowners choose to hire a plumber for this task. This may be because the process is complicated, they’re unfamiliar with it, or there are special features like touch activation that require additional wiring. Whatever the reason, hiring a plumber is always a safer option. Professionals know what they’re doing and will be able to avoid any potential problems that could arise during the installation.
When a homeowner decides to replace a faucet, they first need to make sure the water supply is completely shut off. This can be done by turning off the water at the shut-off valves underneath the sink. Next, the old faucet needs to be removed. This can be accomplished by unscrewing the faucet handle and removing the mounting nuts underneath with a wrench. Once the old faucet is removed, the new one can be installed.
Before installing the new faucet, it’s important to make sure that all of the necessary parts are in place. If you’re using a newer model, the faucet might be pre-assembled and simply need to be screwed into place. If you’re working with an older faucet, it might be necessary to screw in the valve stem and washers before installing the faucet handles. This step is often forgotten, but it’s essential to ensure the new faucet will work properly.
Once the new faucet is in place, it’s important to make sure that the connections are tight and there are no leaks. To test for leaks, turn on the water and let it run for a few minutes. This will flush any particles out of the lines from working on the sink and will ensure that all connections are watertight.
If a leak is discovered during the testing process, it’s time to call a plumber to fix the issue. A plumber will be able to find the source of the leak and correct it quickly and efficiently.
When choosing a plumber for your faucet installation, it’s important to get quotes from multiple companies. This will give you an idea of the average cost for this service in your area. It’s also important to look at reviews and testimonials before choosing a plumber for the job. Make sure that the plumber is licensed, insured, and has a good track record in your community.
The average cost for a plumber to install a sink faucet is $150, but this can vary significantly depending on your location and the type of faucet you’re having installed. Be sure to take into account any additional costs, like if the plumber is required to move any pipes or other components during the installation. Lastly, be sure to consider the quality of the faucet that you’re having installed. Cheaper models tend to have more issues than higher-end options.
Faucet Replacement
If your faucet is dripping and you can’t stop it with plumber’s tape, it’s time to replace it. A dripping faucet wastes water and can cause mold, so the sooner you get it replaced the better. However, you should first make sure that the leak isn’t due to a damaged valve or supply line.
Turn off the water supply valves beneath your sink by turning them clockwise. Be sure to drain the water lines by putting a bucket or pan under the sink and letting the water drip. This will prevent any future leaks and save you from having to pay a plumber for additional services.
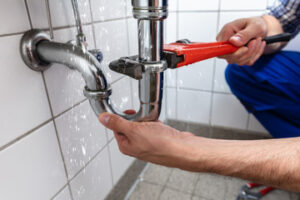
Using a wrench, loosen the nuts connecting your water supply hoses to the valves by hand. If the nut is stuck and won’t budge, use a basin wrench to remove it. You can find these at most hardware stores or plumbing supplies centers. A basin wrench is a long-handled tool designed to reach into tight spaces under sinks. They cost between $10 and $25.
Once the connections are removed, carefully unscrew plastic locknuts that hold the faucet body to the sink by hand. Many aging faucets have brass locknuts that have seized, so you may need to use a basin wrench instead of an adjustable wrench. Once the faucet is removed, you can install the new one as directed in the manufacturer’s instructions. Once you’ve completed the installation, reconnect the water supply lines and turn the water back on. Be sure to clean up any silicone caulk that oozes out from under the sink, as it could damage your countertop or cabinet if left unattended.
If you can’t produce a steady stream of water, it’s likely because of a clogged aerator or hard-water deposits. While you can sometimes clean these with vinegar or lemon juice, extensive deposit buildup is usually a sign that it’s time to replace the faucet.
You’ll probably need a new gasket and faucet seal. Often, these are included with the new faucet, but in some cases you’ll need to purchase them separately. Then, after installing the new faucet, you’ll need to run hot and cold water for several minutes to wash out the lines and check for any leaks. When you’re done, don’t forget to replace the aerator on the spout and test the water flow. If you notice a leak, you can apply additional plumber’s tape or call a plumber for repairs. If there are no leaks, you can enjoy your new faucet!